Animation Workshop By Flash
|
|
|

16.ทำการดับเบิ้ลคลิกที่เลเยอร์ที่ 1 เปลี่ยนชื่อเป็นคำว่า F 
17.ที่เฟรมที่ 1 ของเลเยอร์ F ให้นักเรียนลาก Symbol F จากหน้าต่าง Library มาวางบน Stage ดังภาพ 
18.คลิกเลือกครื่องมือ Selection Tool และนำไปคลิกที่ Symbol F ให้เกิดเส้นสีฟ้าล้อมรอบตัวอักษร หลังจากนั้นไปคลิกที่หน้าต่าง Properties ด้านล่าง ตรงหน้าต่าง Effect Color ให้ทำการเลือกรูปแบบเป็นแบบ Alpha กำหนดค่าความเข้ม-จางของวัตถุ ให้เท่ากับ 0% ดังภาพ 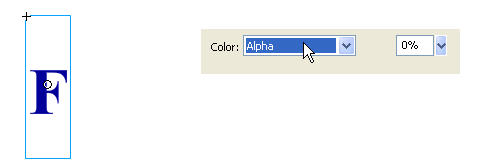
19.ผลลัพธ์หลังจากที่กำหนด Alpha ให้เป็น 0 แล้ว 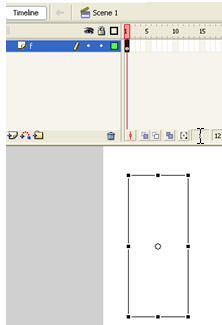
20.ที่เฟรมที่ 10 กดปุ่ม F6 บนคีย์บอร์ด 
21.คลิกเลือกเครื่องมือ 
22.ไปที่หน้าต่าง Properties ด้านล่าง กำหนดค่า Alpha ให้เป็น 100 % 23.จะปรากฎตัวหนังสือขึ้นมาเข้มเหมือนเดิม 
24.คลิกเลือกเครื่องมือ 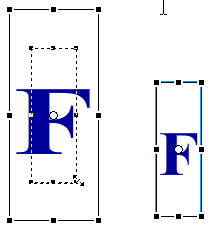
25.คลิกเลือกเครื่องมือ 
26. นำเมาส์ไปคลิกที่เฟรมที่ 80 แล้วกดปุ่ม F5 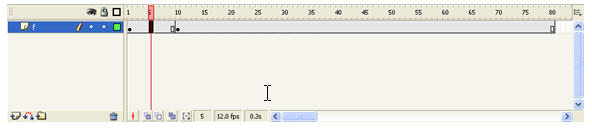
27.หลังจากนั้นให้คลิกเมาส์ระหว่างเฟรมที่ 1 และเฟรมที่ 10 ไปที่หน้าต่าง Properties ด้านล่าง ทำการเลือกรูปแบบ Tween เป็นแบบ Motion
28.จะปรากฏเส้นลูกศรสีม่วงขึ้นมา ให้ลองกดปุ่ม Ctrl + Enter เพื่อดูผลลัพธ์ จะเห็นว่ามีตัวอักษร F ค่อย ๆ ปรากฎขึ้นมาจากขนาดใหญ่กลายเป็นขนาดเล็กและค่อย ๆ เปลี่ยนสี 29.คลิกที่ปุ่ม Insert Layer เพื่อทำการสร้าง Layer ขึ้นมาใหม่ 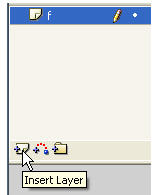
30.ดับเบิ้ลคลิกที่ Layer 2 ทำการเปลี่ยนชื่อเป็น L 
|
© Copyright || Web design by St.Francis Xavier || All rights reserved.
|


ช่วยด้วยครับ
นักเรียนที่สร้างบล็อก กรุณาอย่า
คัดลอกข้อมูลจากเว็บอื่นทั้งหมด
ควรนำมาจากหลายๆ เว็บ แล้ววิเคราะห์ สังเคราะห์ และเขียนขึ้นใหม่
หากคัดลอกทั้งหมด จะถูกดำเนินคดี
ตามกฎหมายจากเจ้าของลิขสิทธิ์
มีโทษทั้งจำคุกและปรับในอัตราสูง
ช่วยกันนะครับ
ไทยกู๊ดวิวจะได้อยู่นานๆ
ไม่ถูกปิดเสียก่อน
ขอขอบคุณในความร่วมมือครับ
ด่วน...... ขณะนี้
พระราชบัญญัติลิขสิทธิ์ (ฉบับที่ 2) พ.ศ. 2558
มีผลบังคับใช้แล้ว
ขอให้นักเรียนและคุณครูที่ใช้งาน
เว็บ thaigoodview ในการส่งการบ้าน
ระมัดระวังการละเมิดลิขสิทธิ์ด้วย
อ่านรายละเอียดที่นี่ครับ